Introduction
Brake drums are critical components of many braking systems – from passenger cars to heavy-duty trucks – and knowing how to measure brake drums is an essential skill for purchase, maintenance, and safety. In this guide, our experts at TBP Auto will walk you through the basic way to measure drum brakes using the correct tools and techniques.
Brake Drum Measuring Tools You’ll Need
Before you learn how to measure drum brakes, gather the proper tools. You can be flexible in your choice of gear, as some of the following tools, such as safety glasses and dust masks, are recommended primarily for measuring old drums.
- Brake Drum Micrometer or Brake Drum Caliper (Brake Drum Gauge Tools): These are specialized brake drum diameter gauges, essential for precise measurements.
- Jack Stands and Lug Wrench: You’ll need these to safely lift the vehicle and remove the wheel and drum for measurement.
- Protective Gear: Safety glasses, mechanic’s gloves, and a dust mask.
- Wire Brush or Brake Cleaner: Use these to clean rust or brake dust from the drum’s surface before measuring.
Prepare the Brake Drum for Measurement
Following a systematic process will ensure you good preparation on how to measure brake drums correctly.
For Old Drums
- Prepare the Vehicle: Park on level ground, chock the wheels, and release the parking brake if you’re working on rear drums. Loosen the lug nuts, jack up the vehicle, set it on jack stands, and remove the wheel. Always make sure the vehicle is stable before starting.
- Remove the Drum: Many drums can slide right off. For hub-style drums, you may need to take off the dust cap, cotter pin, and axle nut. If the drum is stuck, tap it with a rubber mallet or back off the adjuster to free the shoes, then pull the drum off carefully.
- Clean and Inspect: Put on a mask and safety glasses, then wash out brake dust with cleaner or water and wipe the surface. Look for cracks, deep grooves, or a heavy ridge – any serious damage means the drum should be replaced immediately.
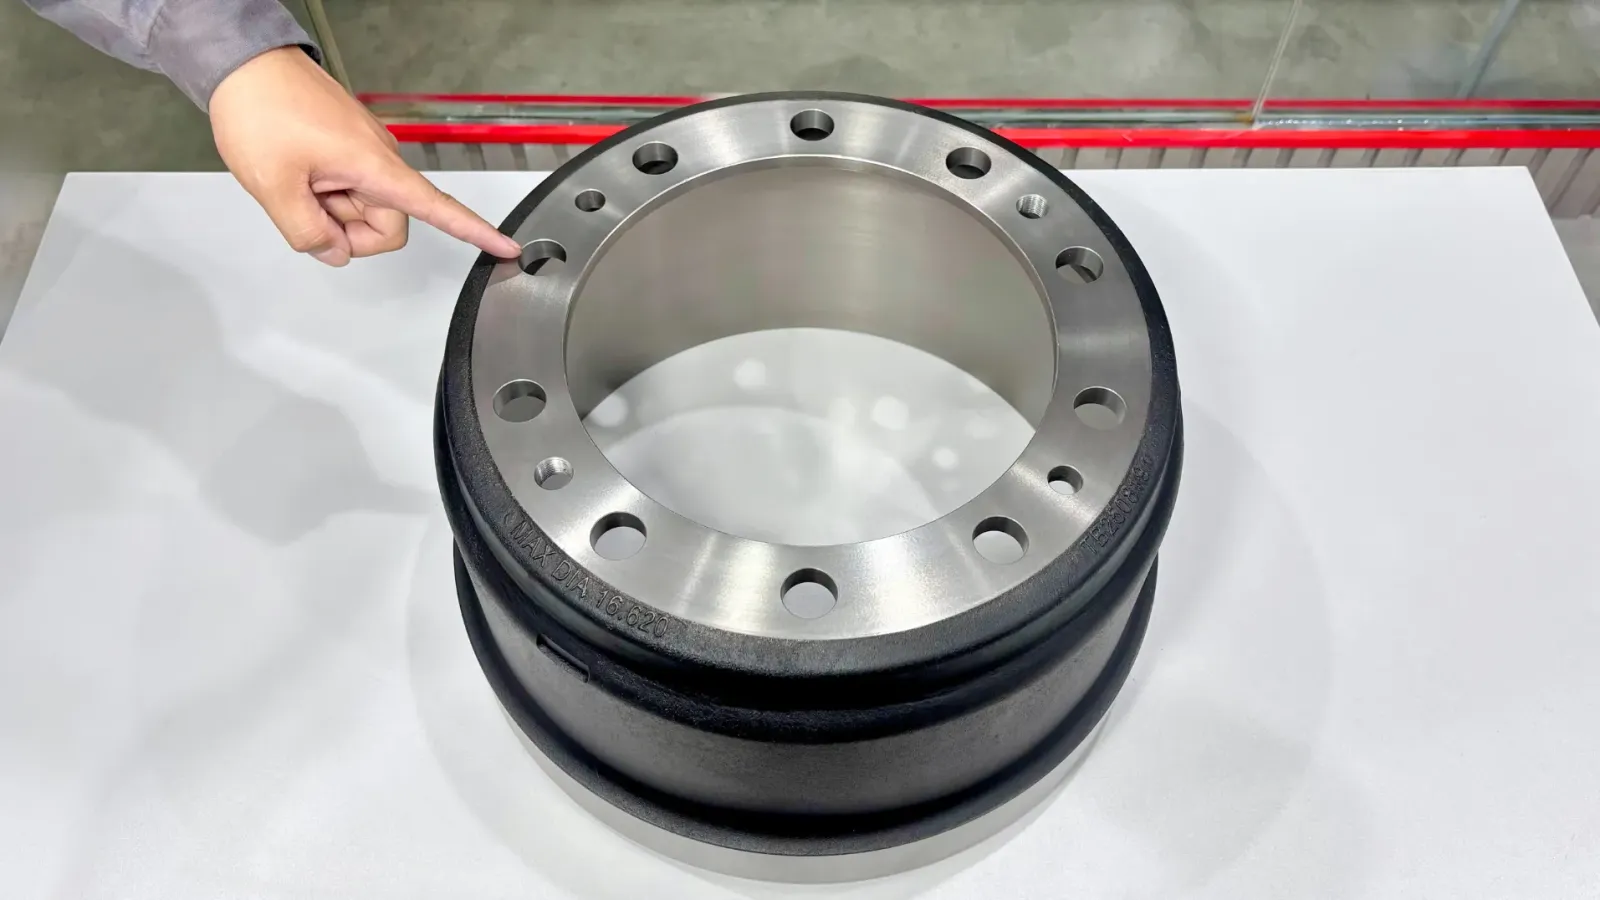
- Find the Spec: Check the outer edge of the drum for the size and maximum diameter marking (e.g., “Max Dia. 280mm”). This is the wear limit. If it’s not visible, use a service manual or a brake drum measurement chart.
- Check Roundness: Measure the diameter in several spots. Small differences can sometimes be corrected by machining, but if the variation is more than ~0.015″, the drum is out-of-round and should be replaced.
>>> Watch more: Brake Safety Week Check: Can you spot a dangerous drum?
For New Drums
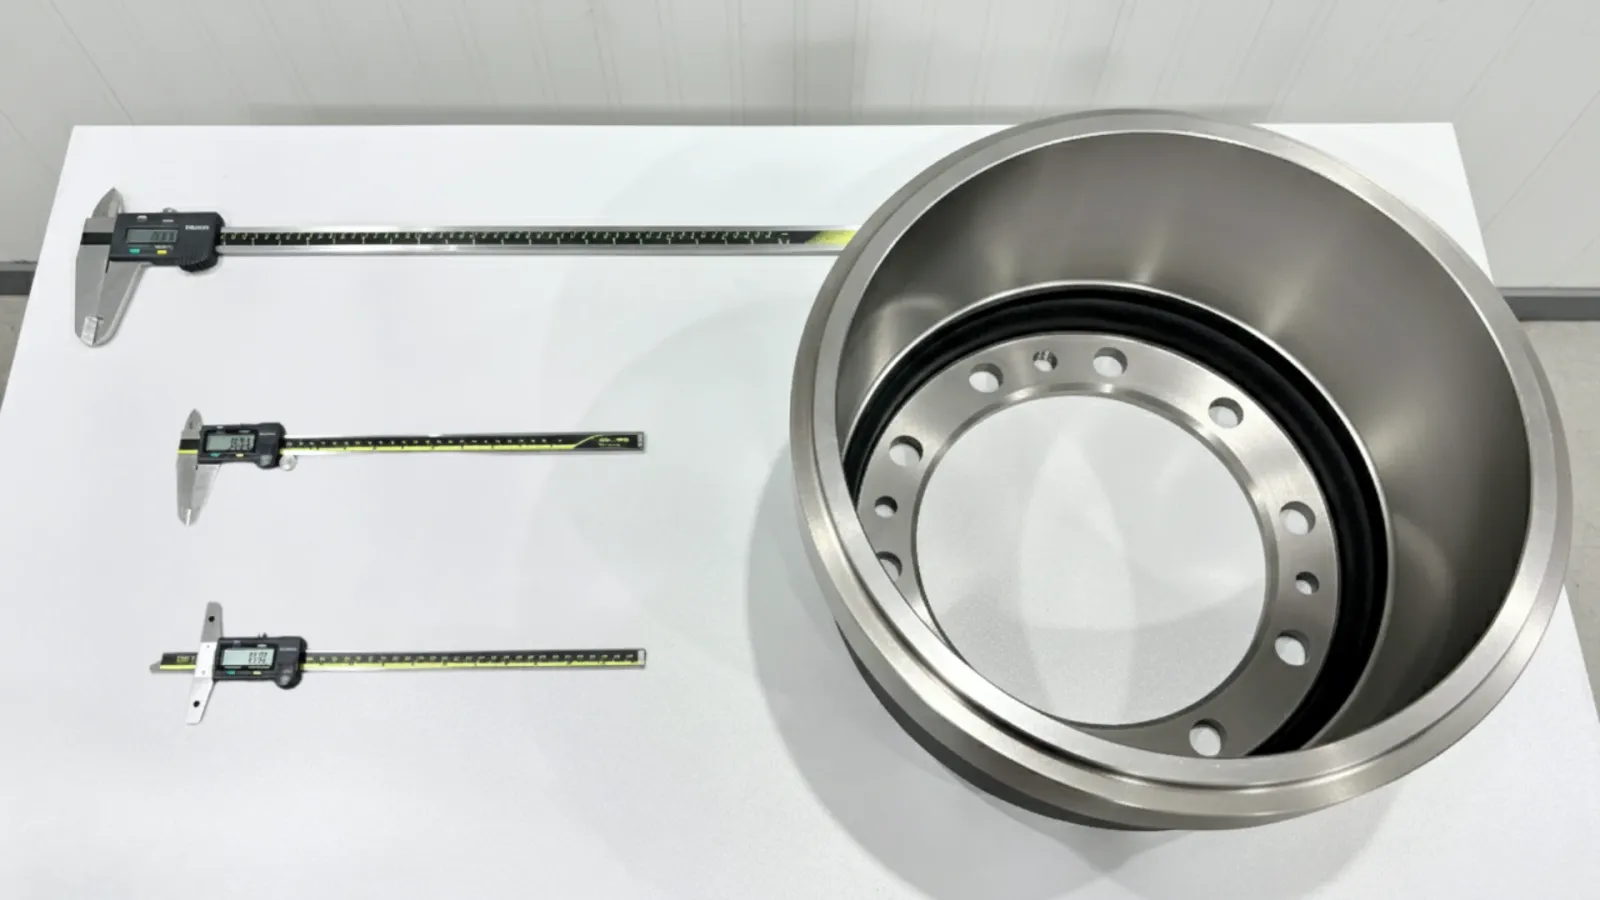
Simply place the drum on a clean, flat surface with a workable height to ensure precise measurements.
Key Brake Drum Measurements & How to Measure Them
When you can’t read a part number to replace a brake drum, there are the key measurements you can take to spec a drum. These dimensions let parts suppliers or reference charts match your drum to the right part.
Using a brake drum measurement chart alongside a drum brake diagram makes it easier to find a compatible drum. Below are important brake drum measurements to take and how to measure brake drums accurately:
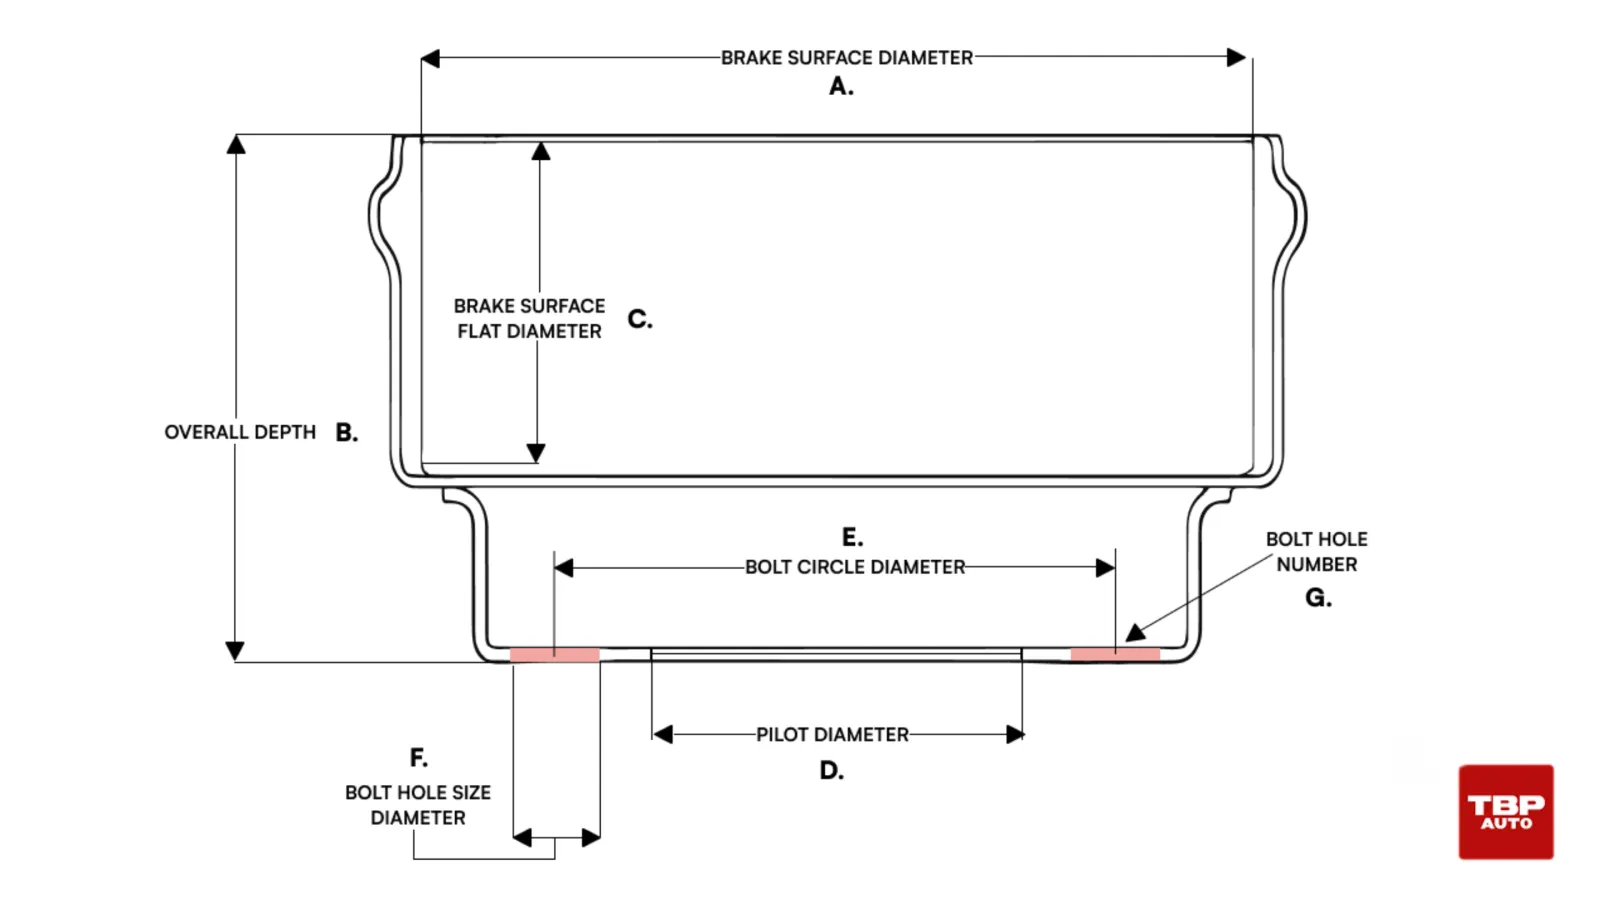
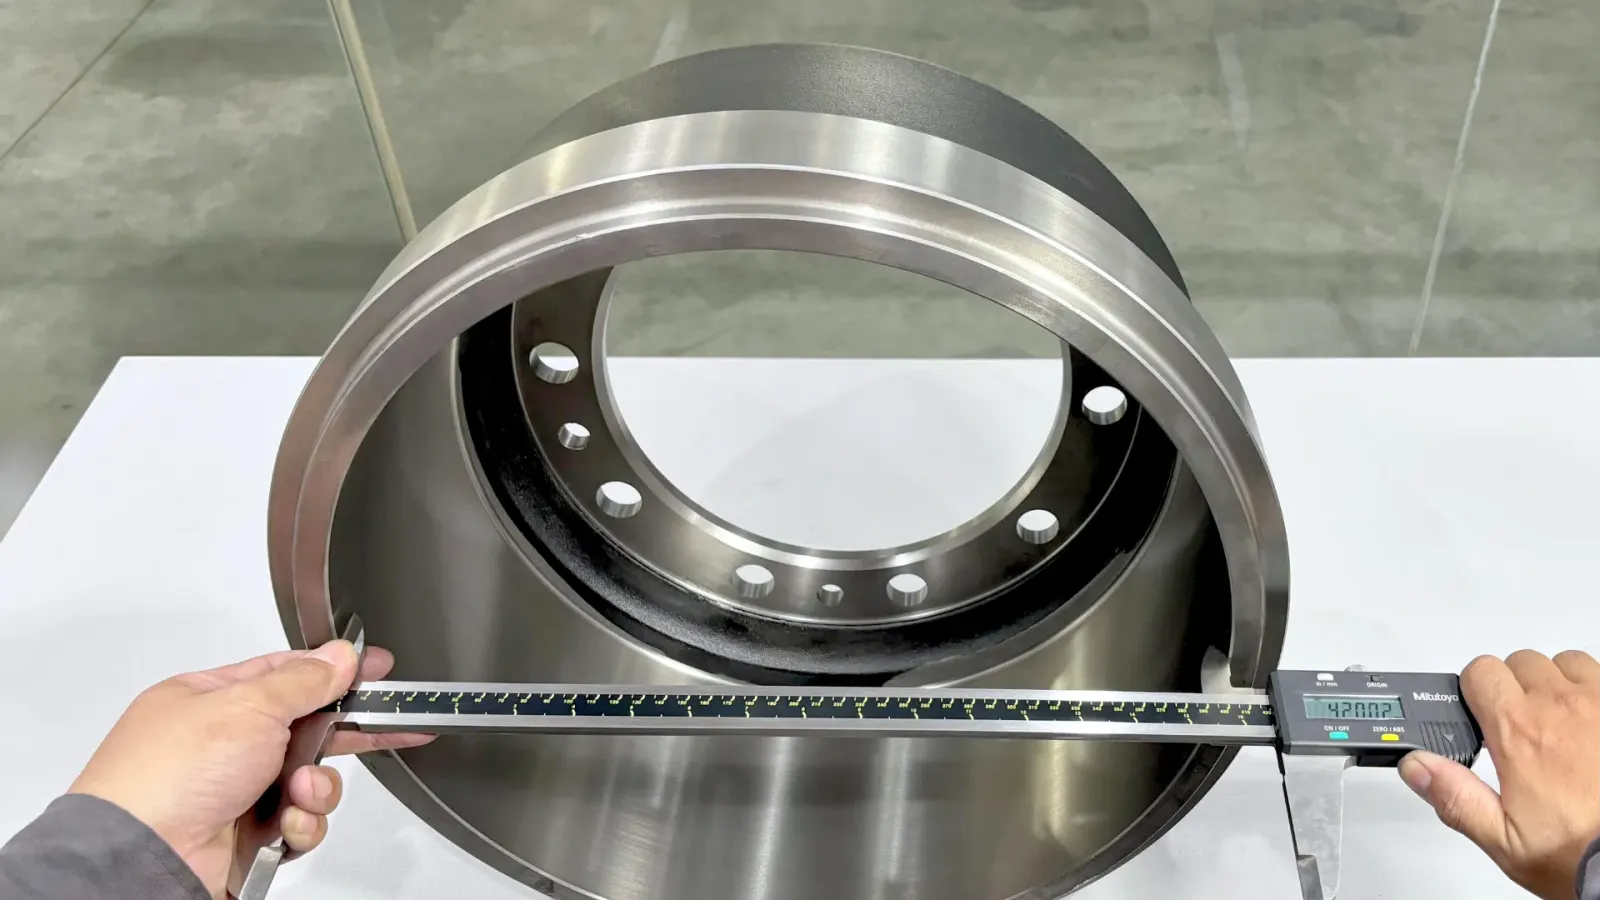
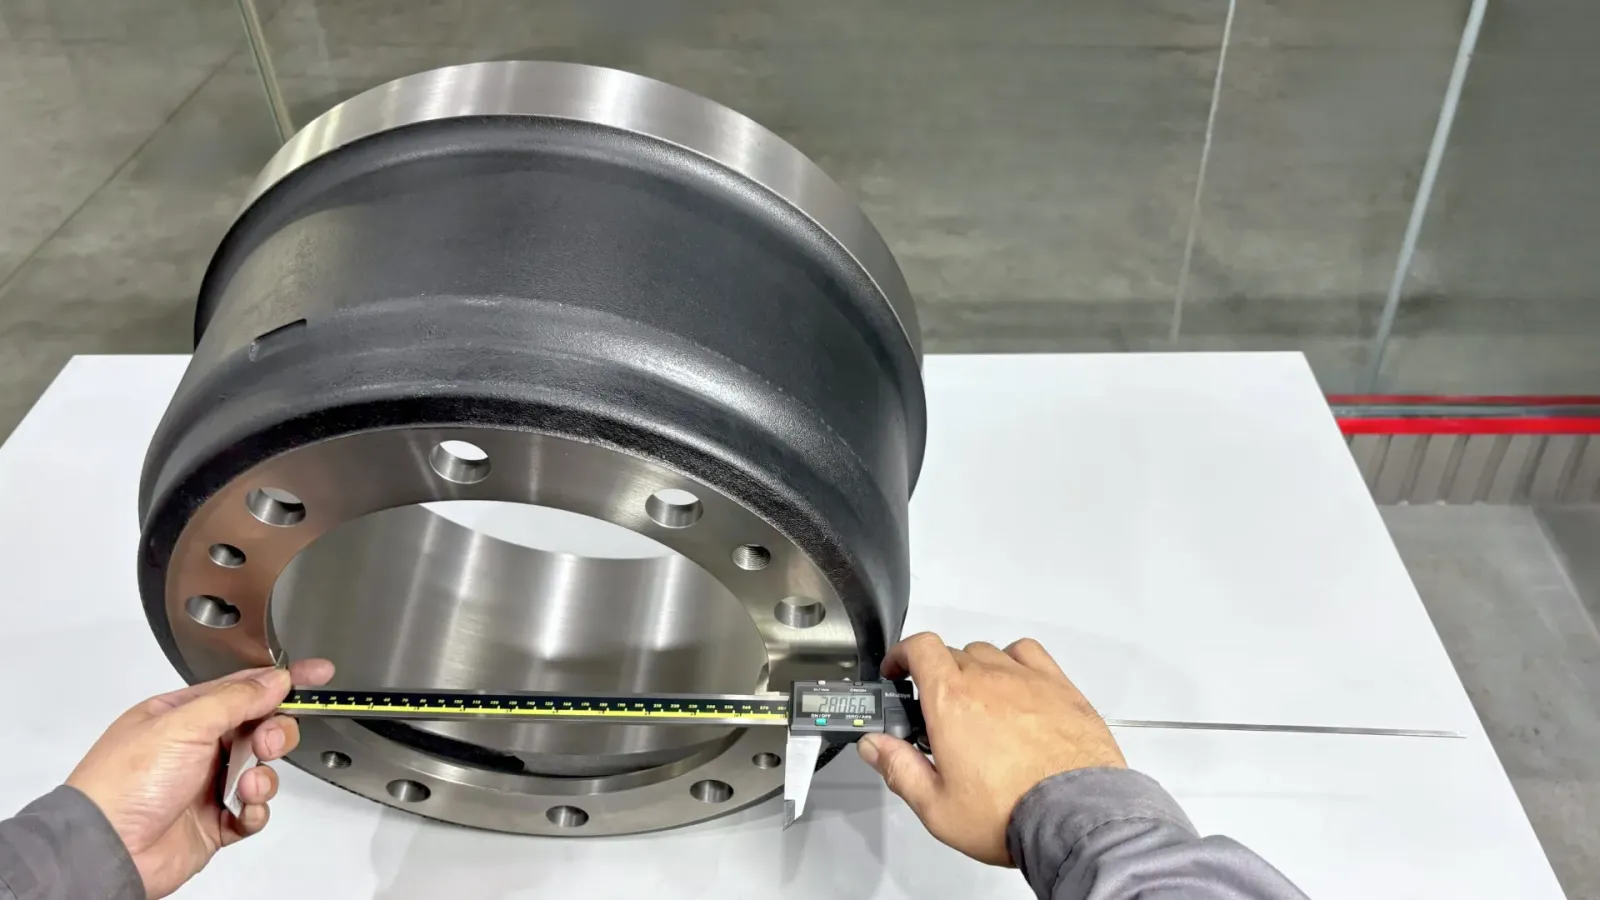
A - Brake Drum Surface Diameter
The diameter of the inner friction surface of the drum – essentially the inside width across the drum where the shoes rub. This is the primary measurement of the drum’s size (for example, a “16.5 inch” drum has a ~16.5″ brake surface diameter). It’s critical for ensuring the drum matches the brake shoes and can provide the correct braking force.
How to measure: Measure this with the caliper as described above.
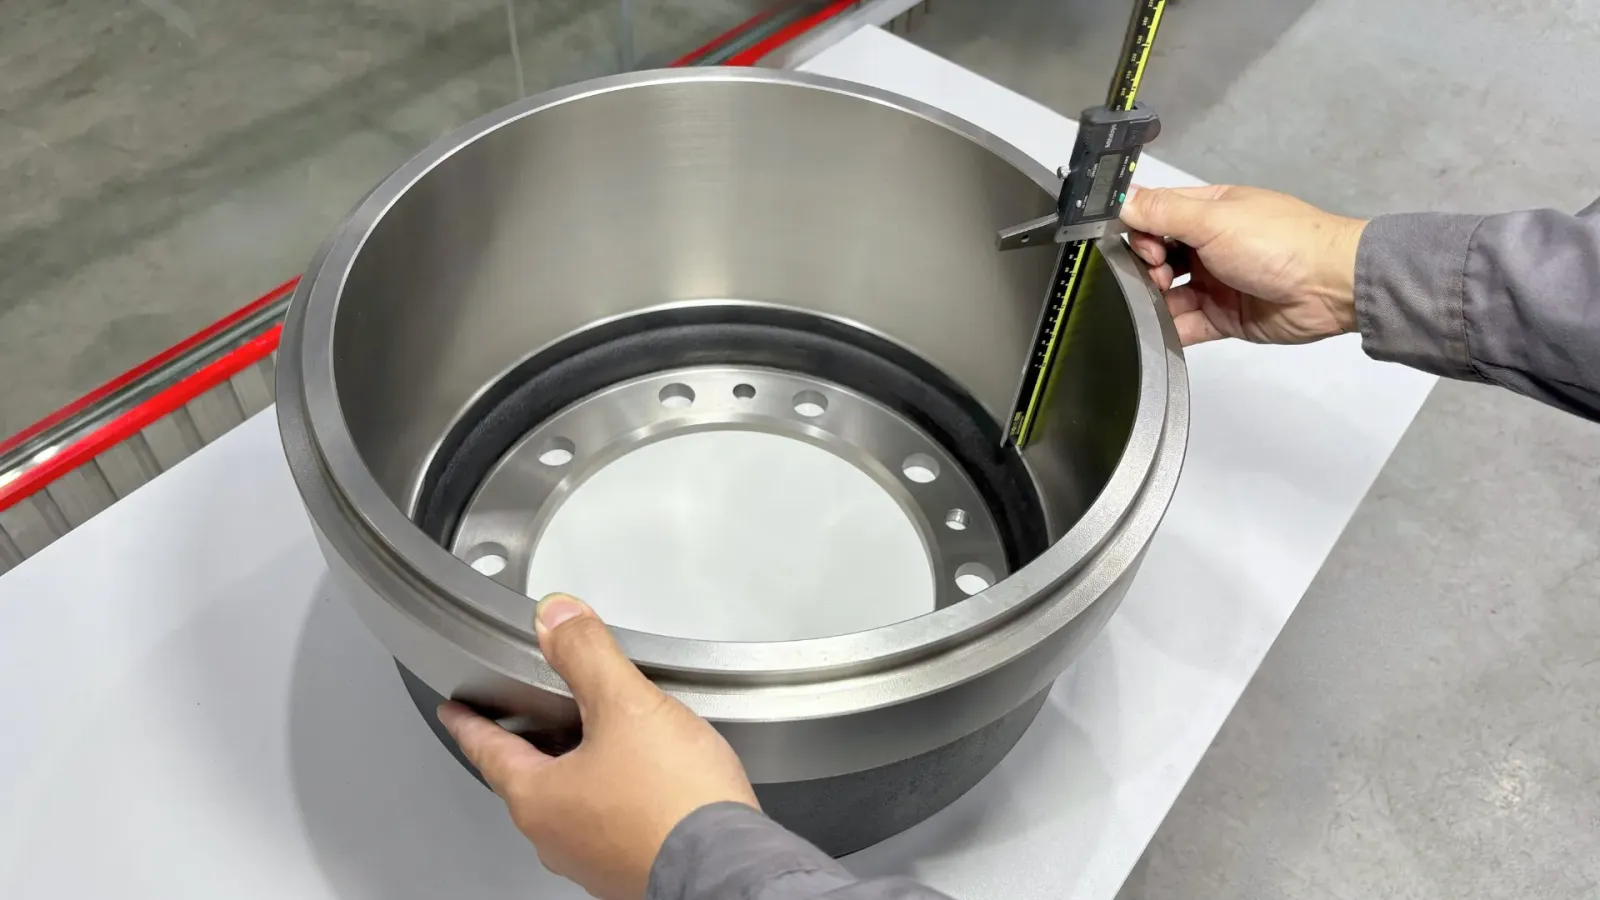
B - Overall Depth/Height
The total depth of the drum from the front outer rim to the inside mounting face (where it sits against the hub). This affects how the drum aligns in the brake assembly. Overall depth is important because an incorrect depth could cause misalignment with the brake shoes.
How to measure: Measure this by placing a straightedge across the drum’s open mouth and using a ruler to measure down to the mounting surface. Ensure you account for any raised areas or lips correctly.

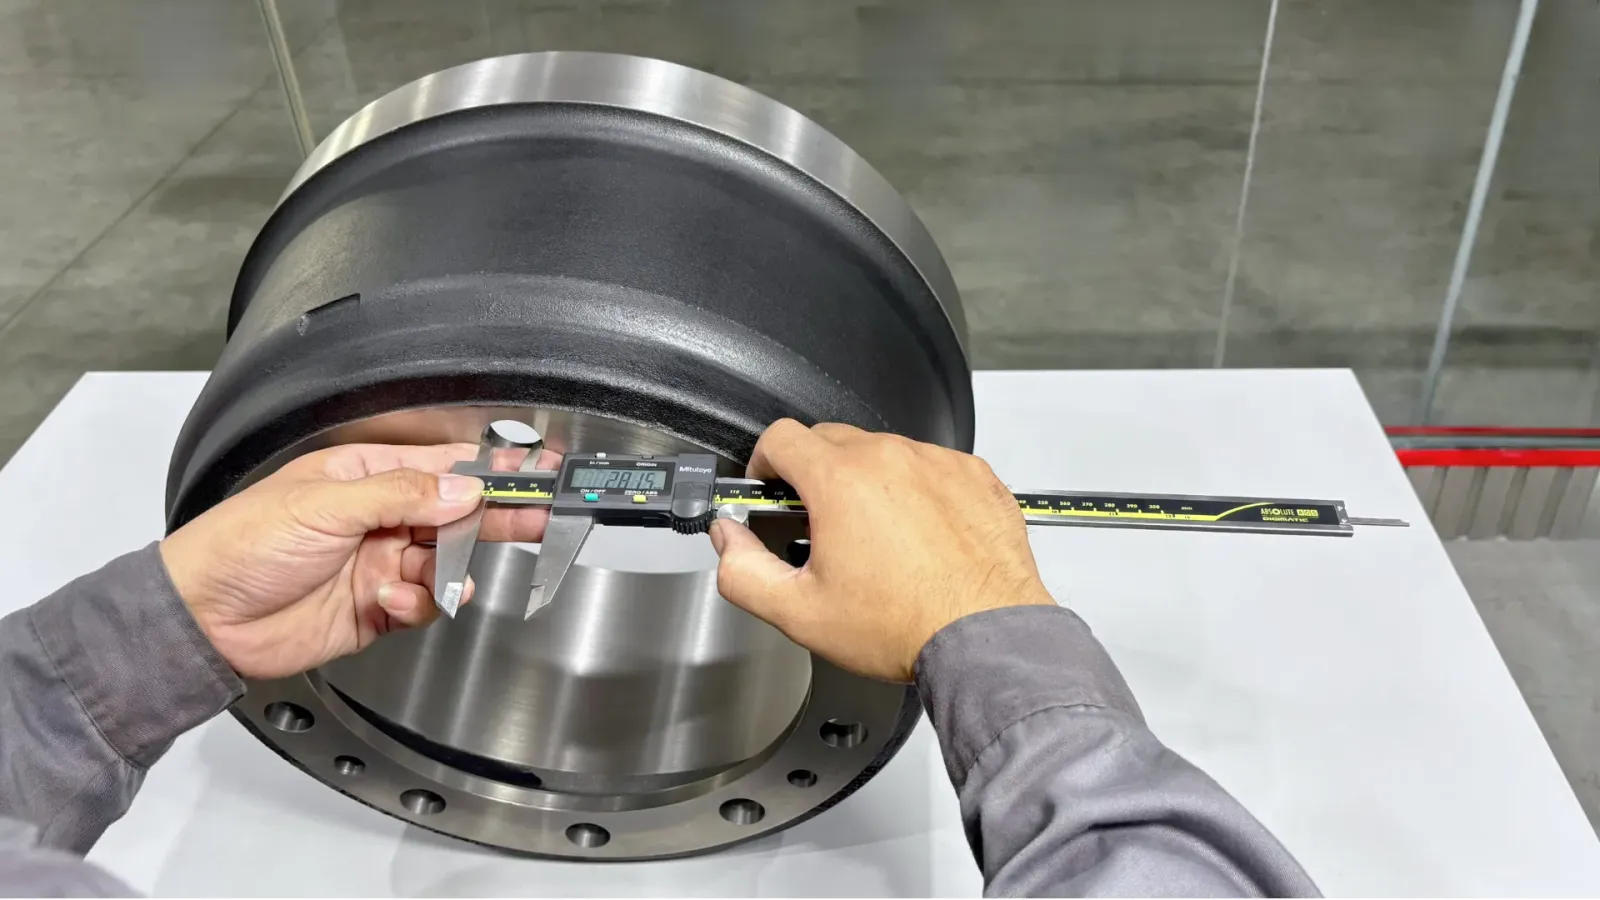
C - Brake Surface Flat Diameter (Brake Surface Width)
The measured width of the friction surface inside the drum. In other words, how deep the “pad track” is from the drum’s outer edge to the inside lip or ridge. This corresponds to the width of the brake shoes (e.g. 7-inch or 8-inch wide shoes). The brake surface width ensures you get the correct drum that matches your brake shoe size and backing plate. If this width is too narrow or too wide for your shoes, the drum won’t fit or the shoes won’t contact properly.
How to measure: Use a ruler or depth gauge to measure the distance of the flat friction surface; some drums may have a slight step or ridge at the inner edge – measure to that point.
D - Pilot Diameter (Center Hole)
The diameter of the center hole of the drum that fits over the hub’s pilot. The pilot diameter must match the hub to center the drum properly. If the pilot hole is too large, the drum will be off-center (causing vibration); if too small, it simply won’t fit on the hub.
How to measure: Use calipers or a tape measure to measure the center opening across its widest point.
E, F, G - Bolt Circle Diameter & Bolt Holes
These measurements describe the drum’s bolt pattern for wheel studs. The bolt circle size diameter (BCD) is the diameter of the imaginary circle passing through the centers of all the bolt holes. Also note the number of bolt holes (typically 5, 6, 8 or 10 on larger truck drums) and their size (diameter of each hole). These specs ensure the drum will mount to your wheel hub’s stud pattern. For example, a common heavy truck drum has 10 holes on an 11.25″ bolt circle with 0.875″ hole size.
How to measure: Count the holes and use calipers to measure one hole’s diameter. The BCD can be measured by measuring from the center of one hole to the center of the hole directly across (for even-numbered patterns), or from the center of one hole to the outer edge of the far hole and then consulting a conversion chart if needed. In most cases, you can obtain the BCD from manufacturer data if you have the drum’s other specs, but measuring directly provides confirmation.
Each of these measurements should be taken as accurately as possible (within 1/32″ or a millimeter). Write them down and double-check any borderline values. With these specs, you can reference a brake drum measurement chart or manufacturer catalog to find the exact replacement.
For instance, TBP Auto has a detailed brake drum measurement chart for each and every one of our products, showcasing all you need to match a drum. Using a chart ensures you account for subtle differences and select a drum that will fit.
>>> Read more: Key Specifications to Consider When Purchasing Brake Drums for Your Truck
Warnings and Tips to Measure Drum Brakes
When measuring and working with drum brakes, keep these tips and precautions in mind:
- Use Proper Support: Always ensure the vehicle is securely supported on jack stands before removing wheels or drums. Block the opposite wheels to prevent rolling.
- Avoid Hot Drums: If you’ve just driven the vehicle, brake drums can be extremely hot. Let them cool before handling or measuring. Not only can a hot drum cause burns, but measuring a hot drum can be less accurate (metal expands when hot, altering the measurement slightly).
- Handle Heavy Drums with Care: Large commercial vehicle brake drums can be very heavy (often 50-100+ lbs). Use proper lifting technique – lift with your legs, not your back – or get assistance when removing or installing a heavy drum. Keep fingers clear of pinch points when sliding drums on or off.
- Double Check: For accuracy, measure the drum at least twice and preferably with two methods if available (for example, a drum micrometer and an inside caliper) to cross-verify the readings.
- Don’t Exceed Specs: Never “gamble” with a brake drum that is at or beyond its wear limit. The small cost of a replacement drum is nothing compared to the safety risk of brake failure. If a drum is even marginally over spec, replace it.
- Consult Experts if Unsure: If you are unsure about how to measure a drum brake, consult a professional mechanic or reach out to TBP Auto for technical support. It’s better to get expert advice than to make an assumption on something as critical as brake components.
Conclusion
Keeping your brake drums within spec is key to vehicle safety. Now that you know how to measure brake drums and interpret the results, don’t wait until a failing drum causes issues. If your drums are worn or you’re performing an overhaul, check out TBP Auto’s selection of robust, long-lasting brake drums. With our quality products and support, you can maintain confidence in every stop your vehicle makes.
Contact TBP Auto today to learn more about our premium brake drums and get a quote on the parts you need.